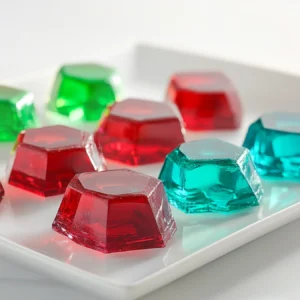
Homemade Crystal Candy
Crystal candy, also known as rock candy, is a fun and delicious treat made by crystallizing sugar over time. This recipe provides step-by-step instructions on how to grow beautiful, edible sugar crystals on sticks or strings. It’s a great science experiment for kids and a unique homemade candy for any occasion.
Ingredients
- 2 cups 400g granulated sugar
- 1 cup 240ml water
- Food coloring optional
- ½ tsp flavor extract e.g., vanilla, cherry, mint (optional)
- Wooden skewers or cotton strings
- Clothespins or clips to hold skewers in place
Instructions
Step 1: Prepare the Skewers or Strings
- Soak the wooden skewers in water for 5 minutes, then roll them in sugar. Let them dry completely—this helps the crystals form faster.
- If using strings, tie them to a pencil or a stick so they hang inside a glass jar without touching the sides.
Step 2: Make the Sugar Syrup
- In a saucepan, heat water over medium heat. Slowly add sugar while stirring continuously.
- Keep stirring until all the sugar dissolves and the mixture reaches a simmer. Do not let it boil too long.
- Remove from heat and add food coloring and flavor extract if desired. Stir well.
Step 3: Set Up the Crystallization
- Carefully pour the hot sugar syrup into clean glass jars.
- Place the prepared skewers or strings into the jars, making sure they do not touch the bottom or sides. Secure with clothespins or clips.
Step 4: Let the Crystals Grow
- Place the jars in a cool, undisturbed area. Cover loosely with a paper towel to keep dust out.
- Wait 5-7 days for the sugar crystals to form. The longer you wait, the larger the crystals will grow.
Step 5: Finish and Serve
- Once the crystals have grown to your desired size, carefully remove them and let them dry for a few hours.
- Enjoy your homemade crystal candy or wrap them as gifts!
Notes
- The slower the crystallization process, the larger and clearer the crystals will be.
- Using distilled water instead of tap water can result in clearer crystals.
- If no crystals form after 24 hours, try reheating the syrup, adding a bit more sugar, and restarting the process.